Changing Floor Plan Heights In Revit
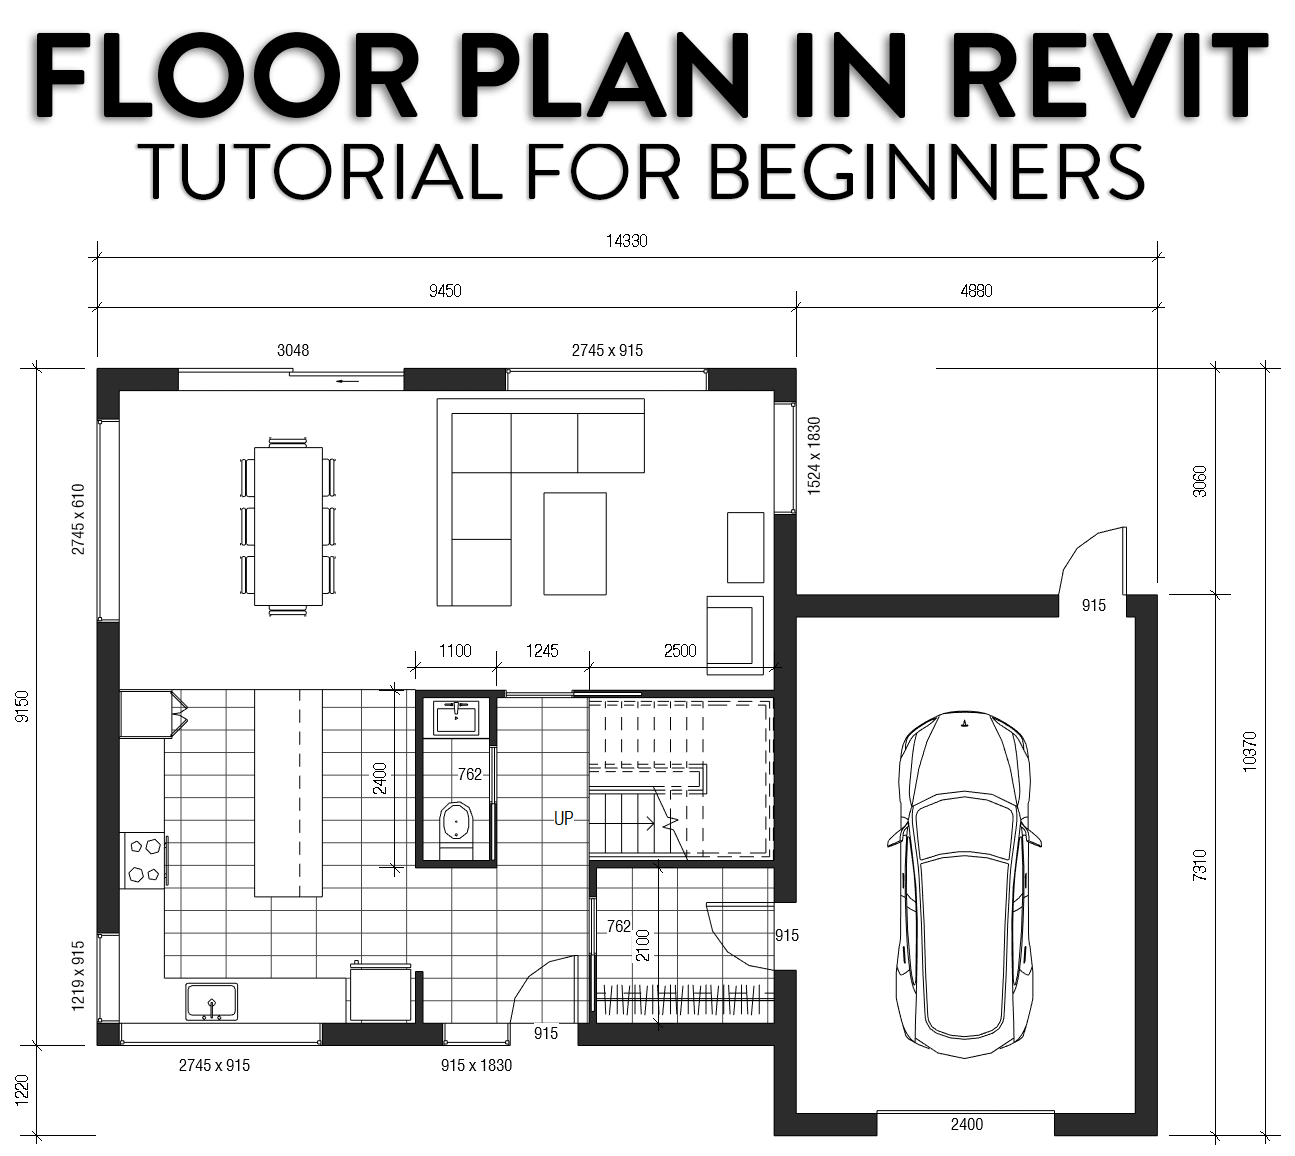
14 Beginner Tips To Create A Floor Plan In Revit Revit Pure

Solved Revit Floor Plan Showing Objects From Floor Above Autodesk Community Revit Products

How To Set The Height Of Each Floor Autodesk Community Revit Products

Beginner Revit Tutorial 2d To 3d Floor Plan Part 2 Youtube

Revit 2016 Project B 17 Adding Kitchen Casework Or Joinery Revit Architecture Joinery Projects
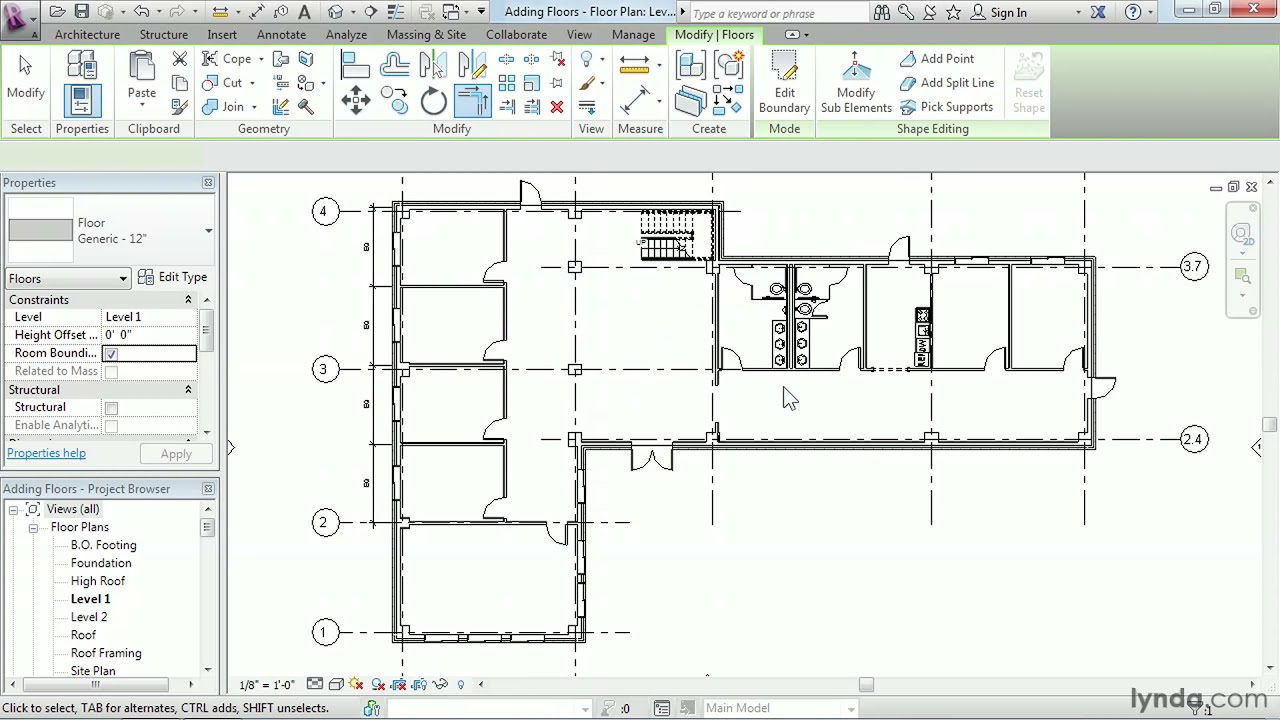
Revit Architecture How To Work With Floors Lynda Com Tutorial Youtube
Use the depth clipping parameter to display parts of a model below the cut plane.
Changing floor plan heights in revit.

Jochesxp I Will Draw Your Floor Plan Elevations Roof Plan Or Sections For 25 On Fiverr Com Floor Plans House Plans Autocad

Revit To Indesign Indesign Diagram Image
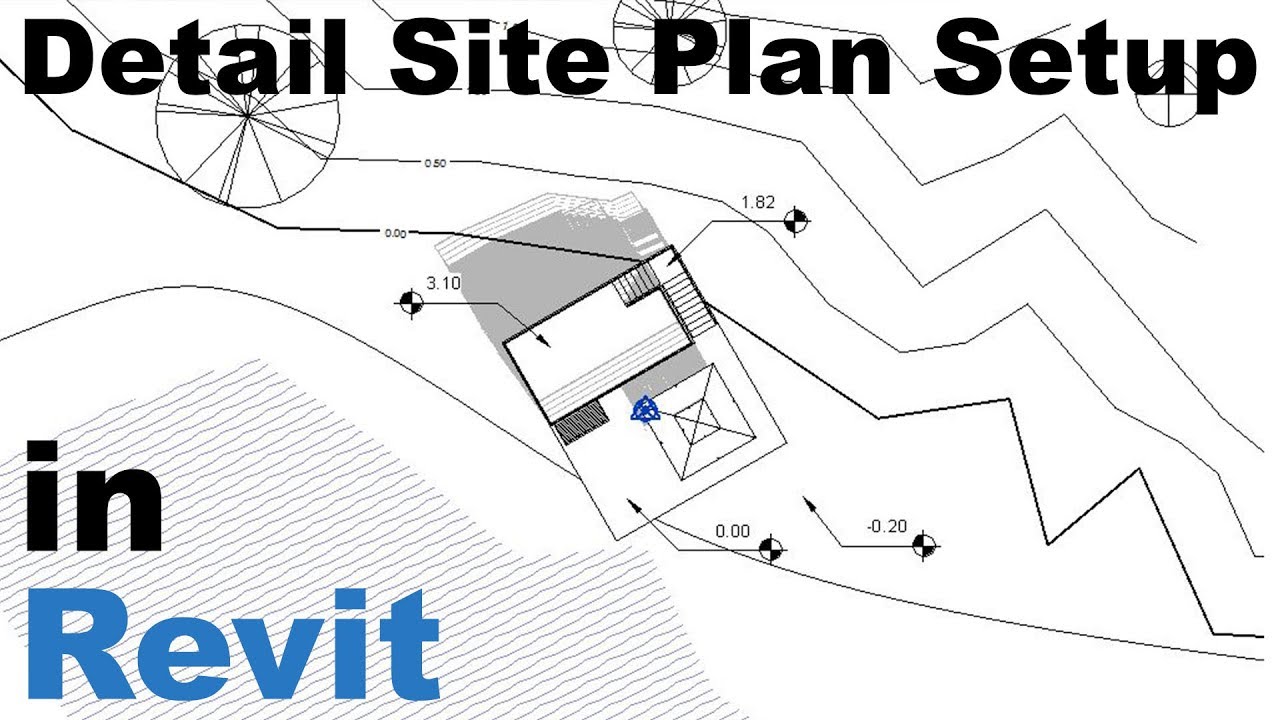
Detailed Site Plan Setup In Revit Tutorial Youtube
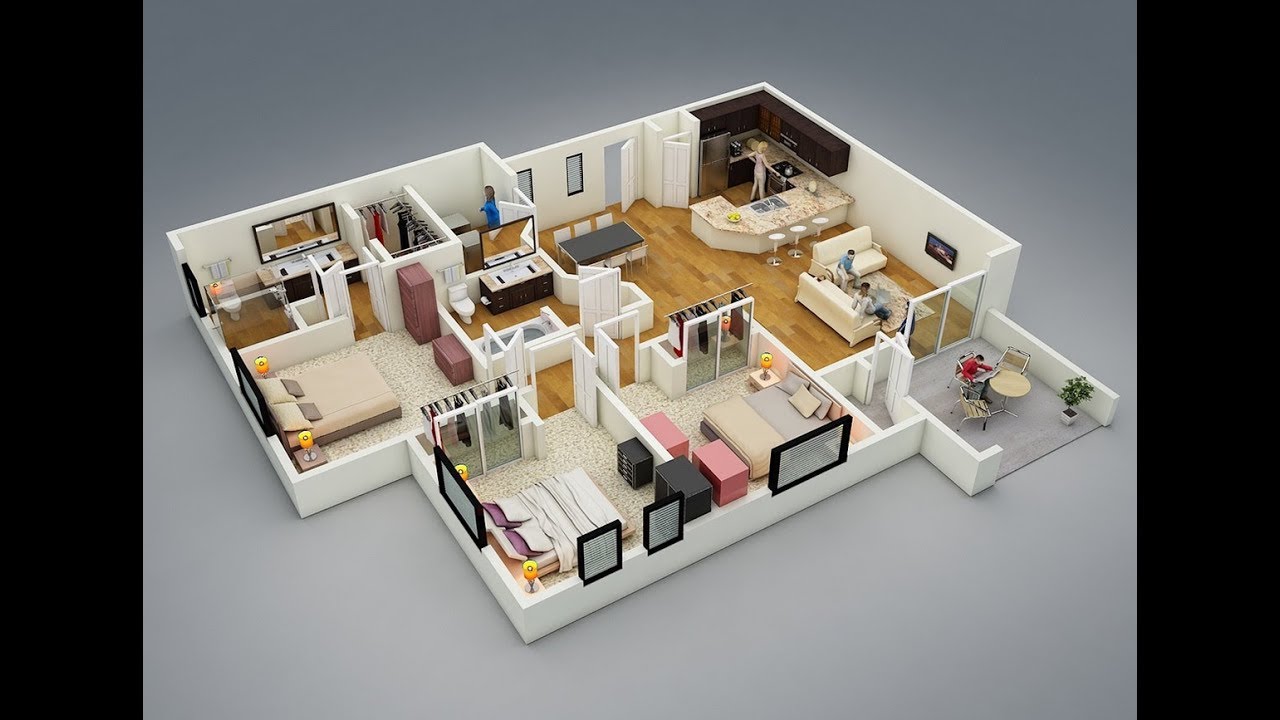
Creating Axonometric Floor Plans In Revit Dylan Brown Designs

Glass Partition Construction Drawing Glass Partition Construction Drawings Ceiling Plan
Video Add A Color Scheme To A View Revit Lt 2019 Autodesk Knowledge Network

Find Mirrored Elements Change

05 Revit Animation Setup Part 2 Youtube Revit Architecture Revit Tutorial Architecture

Generate Color Legend For Ceiling Heights Revit Dynamo Ceiling Plan Generation Parametric Architecture
Revit Tutorial 3d Floor Plan Youtube

Solved Walls Are Not Visible In Floor Plan Autodesk Community Revit Products

Nathaniel Richards Revit Sample Architecture Details Architectural Design House Plans Revit Architecture

Revit Creating Arcs In Property Lines Revit Architecture Arc Lines

Use A Schedule To Edit The Model In Revit How To Plan Design Model

Multi Piece Curbed 30 X 30 X 80 Shower Curbed Threshold 4 Curb Height 4lbs3030 V2 Bestbath Small Bathroom Floor Plans Master Bathroom Layout Bathroom Floor Plans

View Range Revit Products Autodesk Knowledge Network

3d Floor Plan Developed For Project Architecture Project Facade Architecture

Realistic Materials In Revit Enscape Tutorial Revit Architecture Kitchen Decor Images Dining Room Design
Https Encrypted Tbn0 Gstatic Com Images Q Tbn 3aand9gcsp7vd96cqsggkhyqyhy6csxdlmsryuxrzrwtrjvwy60ngmf7q6 Usqp Cau

Autodesk Revit View Scales Bimscape

Construction Documents Construction Documents How To Plan Floor Plans

Pin On A D Computational Design

Casa Simon Simon S House On Behance Autocad Revit House Design Luxury Design

Sketchup Home Plan 12x14m 3 Story House With 4 Bedrooms House Plans Story House 4 Bedroom House Plans
Source : pinterest.com
